SEARCH THIS BLOG

Showing posts with label tutorial. Show all posts

Tuesday, October 10, 2017

DIY Owl Costume

OMG the cute factor on today’s handmade project is off the charts adorable!  Welcome to Day 7 of the 13 Days of Handmade Halloween!  Today’s project is from the fabulous Miss Mimi Cute Lips!  She’s sharing how to make a DIY Owl Costume!


I mean……c’mon!  I told you the cute factor was off the charts adorable.  Now, go on and dig through your felt stash and get to making!  Snaps to you for Mimi for sharing this super cute costume!  I looooove it!

We’re past the halfway mark with some fantastic and fabulous Halloween crafts and projects.  If you’ve been following along, I hope you’re enjoying yourself and knee deep in hot glue, glitter, bat wings and felt!  


Have you heard about our awesome giveaway?
  Oriental Trading Company has provided us with a $75 Gift Card to those following along.  Oriental Trading Company is my go to online store for all my Halloween party goodies so, be sure to enter!


You can enter the giveaway by following our makers here:


Also, check out our Linky Party to see all the wonderful ideas being shared by our 13 Days of Handmade Halloween Makers!


LET'S GET SOCIAL!


Visit me @cwbdparties on Instagram, Facebook, Twitter and Pinterest and tag me when share your best crafting moments using craft ideas from my site!


Saturday, October 22, 2016

DIY Monster Horns - 13 Days of Handmade Halloween 2016: Day 12

It's day 12 of the 13 Days of Handmade Halloween today's DIY idea is being shared by Stephanie Knieram of SK Designs.  I am screeching with delight over her Monster Horns tutorial.  When I saw the photo below I actually jumped - this is so AWESOME - God, I love Halloween!!!!


Stephanie....you've outdone yourself with this eeerily fabulous costume idea!  Thanks for sharing!

This project is part of our 13 Days of Handmade Halloween series.  Don't forget to follow along with the series on social media - just make sure to use the hashtag #13DOHH2016 to see all the other great projects from our Handmade Makers and share your projects too - we'd love to see what you create!  There will be a prize for my favorite Halloween creation!


LET'S GET SOCIAL!
Find more celebrations and Halloween fun @cwbdparties on 
Instagram, Facebook, Twitter and Pinterest


Keep up with what our host of makers are sharing this year!


Wednesday, October 7, 2015

DIY Halloween Paper Pumpkin

Hi, Shannon here from Painting Paris Pink. It's that Spooktacular time of the year again! Yep, Halloween is right around the corner. It's one of my favorite holidays and I do love to decorate for it. I am super excited to be back again as a part of Cupcake Wishes & Birthday Dreams' 13 Days of Handmade Halloween. This year I want to show you how to make an inexpensive and super cute pumpkin out of decorative paper. Make one for Halloween & another for Thanksgiving. These would make a fun addition to your fall table.


Halloween Paper Pumpkins Tutorial


 Let our step by step tutorial show you how to use minimal supplies & time to create a Halloween pumpkin that is sure to delight. Skill Level: Easy Supplies Needed:
  • assortment of Halloween themed scrapbook paper
  • chenille stems (AKA pipe cleaners) - I used brown but wish I had gotten black
  • double sided tape, glue or other adhesive
  • circle cutter, die cut machine OR a circle template and scissors
  • leaf or green paper to cut a leaf
•• NOTES •• I used 8 patterned papers for my 6" pumpkin and 10 patterned papers for my 5" pumpkin. The more papers you use, the fuller your pumpkin will be. 1. Gather your supplies & decide on your pumpkin size (I made one 6" pumpkin & one 5" pumpkin)


Supplies 2


2. Sort your paper into stacks for each pumpkin. Layout your pattern in order of your preference 3. Using your circle cutter, die cut machine or circle template (find some here) cut out your circles for your pumpkin. I love my EK Tools Glass Mat & Circle Cutter)


1st Circle


All Circles


4. Fold your circles in half with the pattern on the inside. Be sure to take note of your pattern as you are folding. Example: if you have a pattern with wording you want to be sure that the fold seam will run lengthwise on your paper.


Fold in Half


5. Using your adhesive (glue, double sided tape, etc), glue your first folded pattern to your 2nd folded pattern. Be sure you are gluing the wrong sides of the paper together •• IMPORTANT •• At this point, hold off on gluing the last paper to the first paper until after the next step


First & Second Layer

6. Before you glue your last 2 pieces (first paper to the last paper) together, use a pair of scissors and cut the bottom off of your papers (be sure to check your patterns before cutting... you don't want to cut off the top and have your patterns upside down). This will ensure that your pumpkin will have a
flat base to sit upon.


   Cut Ends for Bottom


7. Now glue your first and last piece together. You should be left with an accordion style looking
pumpkin


   Accoridan Style Pumpkin


Pumpkin part 1


 8. Fan out your pumpkin and stand it upright. Using a pencil or your finger, wrap the chenille stem (pipe cleaner) around a few times to make a Curly Q. Insert the straight end of the stem down through the center of your pumpkin until the Curly Q rests on the top and trim the excess from the bottom. Add your leaf in the same spot as your stem. You can glue them into place if you'd like.


Leaf & Stem


Finished Pumpkins


Voila! Instant, easy & inexpensive Halloween decor. We hope you enjoyed this tutorial and we'd love to see your version on our Facebook page. Pop on over and share your pics on our page!

 XOXO
Shannon & Katherine
Painting Paris Pink

Twitter


Thanks, Shannon!  This paper pumpkin idea is totally mantle-worthy and is a perfect way to use up all that extra scrapbook paper that many of us crafty folks have sitting around!  If you're looking for more diy ideas view our Handmade Halloween archives!


Thursday, December 4, 2014

{TUTORIAL} DIY Glass Footed Candy Dish


Remember back in the day, you'd go to your grandma's house or an older aunt or relative and there was ALWAYS a candy dish sitting out.  You know it had to have hard candy, peppermint, butterscotch....just a small sweet treat wrapped in cellophane!  Those are some of the memories I have as a child.  Well, I bringing those fond memories into my home now, since I now have my own grandchildren (ssshhhhhh.....). 

I came across a very pretty - almost Victorian style - glass bowl at the Dollar Tree (one of my fave places) and thought, boy this would make a cute candy dish....but, I wanted to put a spin on it.  I thought, why not make it a footed bowl!  So, I did.....and here's how I did it!!!!

To make this project you only need a few items......

Strong bonding glue - that will adhere glass to glass like E6000
Fancy glass bowl
Glass candlestick
CANDY!

Gather your supplies!


(I really wish I got a better picture of the bowl.....it's just pretty!)

Carefully place glue around the small end of your candle stick.  This will be the base (or foot) that your bowl will sit on.  Take care not to get the glue on your hands, in your eyes, on your clothes.....and for the love of God don't go sniffing it!  Open a window.  Seriously, you won't work with it that long, but just in case.


Turn your bowl over and adhere the candlestick to the center of the bowl.  Allow it to dry for at least an hour.


Once dried, you can add any old candy you want!  I added a festive bow to mine.  Cute right?


This project literally cost me $4 to make....I only paid for the glass pieces and candy.  I already owned the glue - which you can find at Home Depot or your craft store. You can make this item to keep for yourself and use year round.  It also makes a nice present.  Fill it with fudge or truffles and give to your host/hostess at your next holiday party!


If you like this project idea and want to save it for later, you can pin the image below to your Christmas Crafts Pinterest Board (and if you don't have one......create one.....cause I have more ideas to share over the next few days!!!!)


Monday, October 22, 2012

{13 Days of Handmade Halloween} Halloween Cupcake Toppers

I am a huge fan (and maker) of cupcake toppers.  They're the perfect decoration for cupcakes and so versatile. I mainly use them on cupcakes, but they can be used to add to centerpieces, treat bags and decorative embellishment.  If you've ever wondered how to make your own follow this step by step tutorial on making cupcake toppers for Halloween shared by Donna Martin, from Swish Printables.


Thanks Donna for sharing this fab diy!

GRAB  A  BUTTON


http://cupcakewishesandbirthdaydreams.blogspot.com/p/13-days-of-handmade-halloween.html

Thursday, March 15, 2012

{Thursday Inspiration} DIY Cupcake Pedestal Tutorial - Part 1

{I really wanted to show these to you on Tuesday, but I had to tend to my husband who came down with a case of the nasties.  In fact, between him and my kids, it's no wonder that I haven't gotten a bug yet.....and I really don't want to, so I'll just not put anymore thought into it....on to the post}

I love these cute little cupcake pedestals I am seeing everywhere lately! For me, however, they are a bit pricey. I've seen them run in the range of $14 for just one up to $29 for a set of two.  So, being the crafty and frugal woman that I am I decided to venture out and find a way to make my own.  I've seen people create their own cake stands so, I just applied the same tips to making them into cupcake stands.

modern serveware design by Rosanna                            modern serveware design by Farmhouse Wares
Petite Treat Mini Pedestal modern serveware

Martha Stewart Collection Set of 2 Mini Cake Stands contemporary serveware


I'm excited to share this tutorial/tip with you today.  I showed you the cupcake pedestals that I made for my St. Patrick's Day Rainbow Cupcakes and mentioned that I would show you how to make your own.  It's really easy and cost me less than $10 to make them.

You're gonna need the following supplies:


You will also need to be outdoors or in a well ventilated space because you'll be working with products that are crazy fumey!

To start, add your glue to the base of your candles stick.  You might want to sand the candle with a fine grit sand paper to create a better adhesion.  I just glued mine right to the mirror.


After gluing all the bases to the mirrors, I let them all dry for about 25-30 minutes before applying a primer.  I'm sure you can paint right onto the stands, but because I was using a mirror, I wanted the final result to be as opaque as possible.  Also, be sure to wash and dry everything before applying your adhesive and paint.  


I also used stove burner covers to create larger tiered cupcake stands.  The burners were a bargain at $3 for  about four covers.  I followed the same steps by gluing the base to the burner and then priming each one and allowed for adequate drying times.  You will notice that I switched the position of the candlestick base for the top tier because wanted there to be some balance.


I let the pedestals and stands dry outside for about four hours then, added the spray paint the following day.


Check back tomorrow to see how everything turned out along with a few cute ideas on different ways to use the pedestals and stands and where I got all my supplies.


Friday, February 11, 2011

I was excited to see today that the Upcycle Valentine's Mailbox I created for my daughter's Bugs & Kisses party  was included in the Valentine's Day Roundup on One Pretty Thing.  HOW COOL IS THAT?


I love One Pretty Thing!  Rachel always does a fab job of finding and sharing lots of crafty diy how-to's from all over the web.  If you haven't checked out the site please do so!


Wednesday, February 9, 2011

Upcycled Valentine's Mail Box Tutorial

When I saw this Valentine's Chairbacker at Pottery Barn Kids I was instantly inspired to create a smaller paper version of one for the Bugs & Kisses Party that I'm having for my daughter.


I created one using a red, letter size file folder.  Actually I made a mock up of one last night but it was hideous.  So, I whipped up an entirely new one during my lunch break today - so, forgive me if the backgrounds look a little whacky!


Here's a Tutorial on how you can make your own.

Supplies you will need:

Letter size file folder (I used red)
Ruler
Pencil
Scoring Tools
Bone Folder
Scissors or Cutting Blade
Double-sided tape or Glue
Ribbon
Velcro dots
Chip Board, Die Cut or Sticker Letters
(You can also print out the letters I used found at the end of this post)
Love Bugs Printable Circle Tags


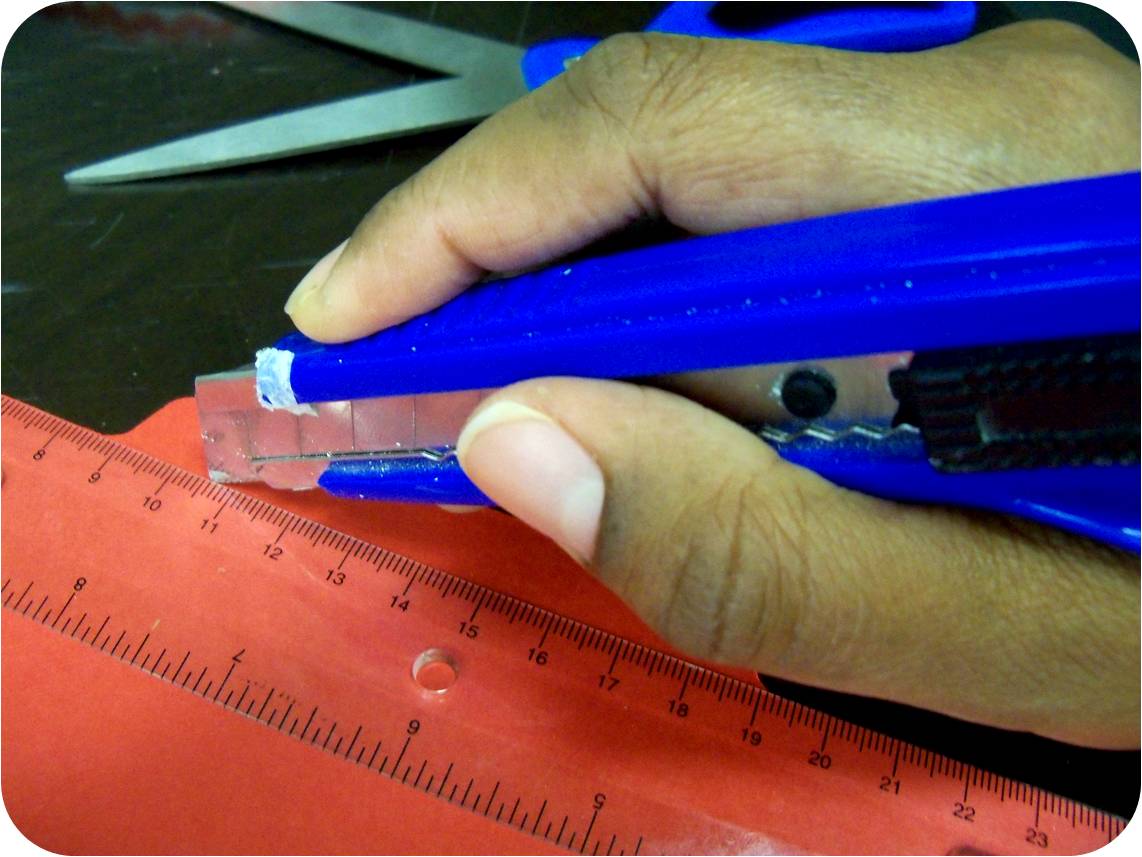
Trim tabs from the folder.


You should end up with a 17" sheet of paper to work with.


 Using the measurement guide (next photo) with a ruler & pencil measure your box then, score, cut and fold where indicated.  If you have a scoring board use it - I have one and I LOVES IT - didn't have it with me at work though......


Your disassemble box should look at bit like this:


Next - assemble your box!


About 3/4" from the edge, cut a 31/4" x 1/4" rectangle in the top center of  the lid. Next, attach a 31/4" strip of paper or ribbon from the front inside of the lid.  Add a Velcro Dot to the bottom of the strip.This creates a tab for you to attach a closure for your box. (btw-those lil' pink hearts are covering up a multitude of non-manicured hands sins)


Next decorate your mail box as desired.  Feel free to use the print and cut letters I used for my project.  If you right click on the words you can print the image directly.

Check this out: I didn't have a glue stick with me so, I stuck the letters to a roll of double stick tape and cut them out with a sharp blade.


 Voila!  Your box is ready for Valentine's and other sweet treats!


Related Posts

Related Posts with Thumbnails