SEARCH THIS BLOG

Sunday, December 28, 2014

{Product Review} Aromatherapy with the ZzzQuil Scented Sleep Aid


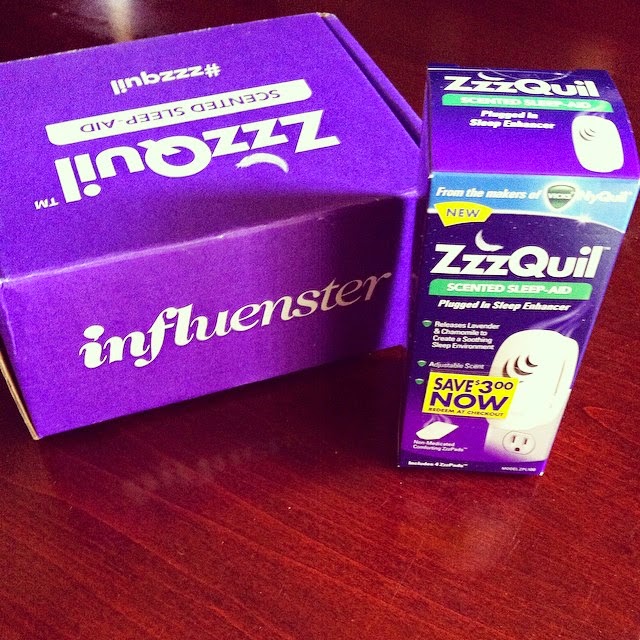
When I first opened the pack, the fragrance was pretty strong. The main scents are lavender, chamomile and cedarwood.  I thought it smelled more medicinal at first but then after a few minutes of plugging it in, the fragrance was definitely more pleasurable. Included in the box is a sleep enhancer (wall plug in) and scented Zzz pads.  You simply put one or two pads into the sleep enhancer, choose your setting and put that into your outlet.  It doesn't take long for the fragrance to permeate the room and then it lasted through the rest of the night and into the next day.  I used both pads the first night.  There is an adjustable slider that you can use to control the amount of fragrance, but I couldn't tell if it made a difference or not.

The second night, I just used one pad and thought maybe I wouldn't sleep as well....but I slept pretty much the same way. The fragrance the second night was not as strong and more pleasant.


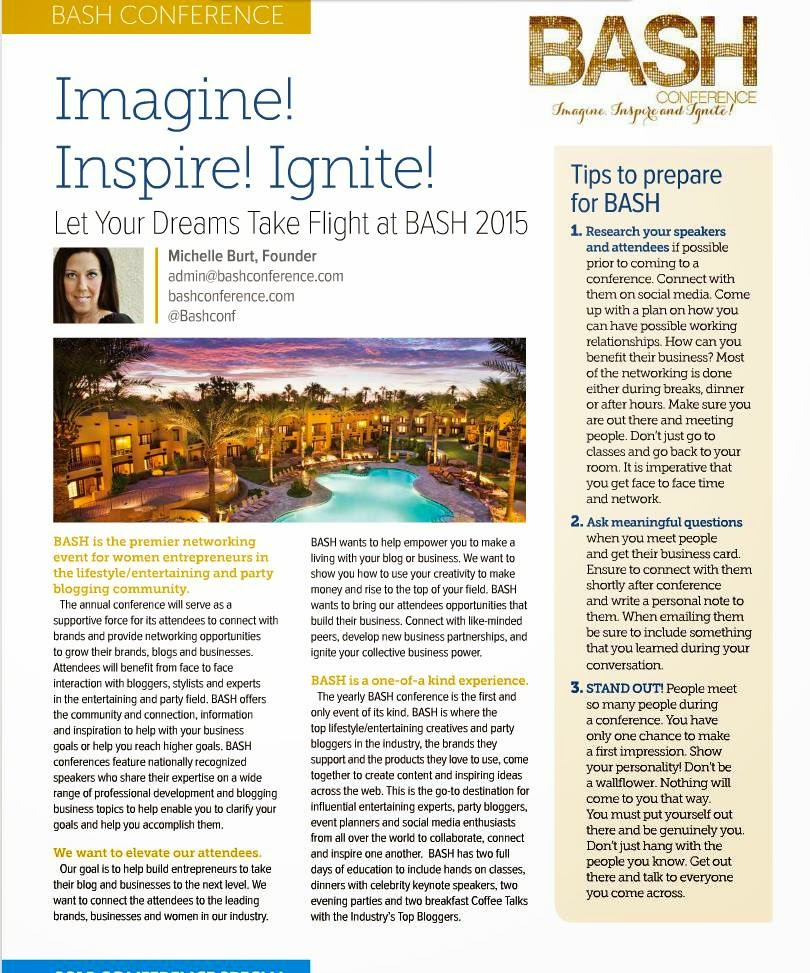
I've been one busy woman these past few weeks, with BASH coming up and the hustle and bustle of the holidays and just life in general, I am physically exhausted.  As tired as I am, I always seem to have trouble falling asleep and then have a restful sleep throughout the night.  So, when I received a complimentary ZzzQuil™ Scented Sleep Aid through Influenster to test out and review, I was anxious to give this product a go!  Now, I've tried other aromatherapy plug ins before and didn't feel like they really were effective, so, I wasn't sure what to expect this time - but I was hopeful.

I've always been a night owl and just generally have trouble drifting off to sleep. I decided this would be a perfect opportunity to use something that didn't put me to sleep medically to help me out. I must say, this actually worked. I plugged it in and slept straight through the night, couldn't believe it. My kids even woke up in the middle of the night to use the bathroom and when I normally would be jolted out of my sleep, I didn't even hear them....(thank God, my husband did).

My only problem with the plug is is you have to touch the pad with your fingers and the fragrance is really strong and it stays on your hands. I had to wash my hands a few times to get rid of the smell as best I could.  Other than that, I love it and recommend it to anyone who needs to relax or have a restful night's sleep.

If you would like to share your experience give opinions of products and experiences via social media you can link up with Influenster here - this will take you straight to my referral page where you can apply!


Wednesday, December 24, 2014

{Holiday Home} Silver & Gold Rustic Luxe Decor

I spent the day finishing up decorating my home for holidays and wanted to just share the Silver & Gold Rustic Luxe theme I chose for this year.   I made many of the items for this set up by hand, or purchased them for very little at the dollar store, on clearance or on an awesome sale!

You know, I can find inspiration just about anywhere.  Last Christmas I made all my Christmas cards by hand and found the most beautiful paper pack at the craft store.  The name of the pack was Rustic Luxe.  I thought, how fitting for a very elegant holiday.  I held onto that paper pack as inspiration for my dining room tablescape, living room mantle and my dessert and cocktail station for our holiday festivities.  Have a look at a few of the photos I captured and how I saved on decor. 


silver and gold holiday decor, deer,rustic


If you ever want to create a custom look to your wine glasses, you can do it all on your own.  Don't spend extra money on anything fancy.  All you need is paint made for glass and a brush.  Here, I created these gold brushed wine glasses for my table.  I love how they look and that they cost next to nothing to make. I already owned the glasses, the brush and the paint!


These gold chargers were used for my Little Miss Spider Lady Halloween party.  I mixed up my place setting with a sliver rimmed plate (from the dollar store) and a gold rimmed salad plate.  Each place setting was topped with a small gift box filled with peppermints.  The boxes were made with my Cricut and the paper is from that beautiful Rustic Luxe paper pack! 


The napkins for the table are from the thrift store.  I created napkin rings by tying ribbons to a jingle bell and tying to the napkins.


I love these mercury glass footed candle holders, they are perfect for this theme and just look so opulent! I also added a mercury glass vintage vase and tealight candle holder (a dollar store find). To add to the tablescape, I added a string of gold beads that were used on our Christmas tree a few years back.  If you notice that twine wrapped tree on the table.....I made that out of a Styrofoam cone, wrapped with twine, painted it gold and glued on embellishments.  Cost me virtually nothing to make!  The ornaments are pulled right out of my Christmas stash.


I have three trees in my house, you can see the main tree in our home in the background of this photo.....I think I really love Christmas!


These cute sisal fox and squirrel animals were finds at Target last year that I purchased after I knew I was going to go with a Rustic Luxe theme this year.  I think they're so adorable and whimsical.


A few weeks ago I found the prettiest gold foil letters by Teresa Collins and had to have them.  I created a festive wall hanging by wrapping tinsel around a picture frame and then attached the letters to a ribbon to create a garland.  A small jingle bell garland was added for a very merry touch!


For my mantle, I added  faux birch wood logs, bleached bottle brush trees and a few elegant holiday decorative pieces to set the scene.  I think the buffalo snow really sets off this winter scene!


I used my little white Christmas tree from last year's Christmas Wishes party and used it here in my dining room and flocked it with gold,silver and white ornaments!


For my dessert station, I created a rustic and glam look by incorporating very chic gold pieces with very rustic pieces - simple right?  I wanted a woodland look to the table but still....with a touch of glam.  I love the look of birch logs and incorporated a lot of that into the design.  I also made a lot of the items by hand.  You might remember the gold sequin wreath from this tutorial.  I  made faux birch wood logs using this super simple tutorial by Design Dazzle.  The Gingerbread 'Lodge' was a labor of love.  I love how it turned out!  I found a mini wooden pallet and sleighs at the craft store and whitewashed them.


I created Birch wood log pretzels by simply dipping a pretzel stick into white chocolate bark and then drizzling with milk chocolate.


These chocolate balls of deliciousness are called Brigadeiro.  If you haven't heard about them, please Google them.  They're a homemade Brazilian candy.  I love them, they will rock your world!!!!


I hope you enjoyed the photos and I wish you a VERY MERRY CHRISTMAS filled with lots of love, peace and JOY!!!!!


Monday, December 22, 2014

{Throwback} Cupcakes & Cocktails New Year's Eve Toasting Station

I was going through a few of my old posts and saw this toasting station idea that I shared back in 2011 for New Year's Eve! 


I love how New Year's Eve ideas can be so timeless and classic.  For this idea, I set up a little area in my home - the buffet in my dining room - as a toasting station outfitted with cupcakes and champagne.  Following suit, I added festive pink and gold decor.  I also dressed up some of my cupcakes with the cutest little wraps to look like a tuxedos! 


I remember that I whipped this up on a whim - just for fun.  It's always nice to go back and look at how far I've come along.  I still use some of the items in these photos for parties and my photo skills are 'bar none' (haha!)

I'm currently finishing work on how I'm converting my holiday home to an easy New Year's Celebration! It's been a steady work in progress, as I'm getting over final school projects with the kids and battling colds (blech)  but, I'll share everything soon (definitely before Thursday/Christmas). 

I can't wait for 2015 - I'm excited for what this new year has in store for me! 


Wednesday, December 17, 2014

{On a Personal Note} Why I Know Going to BASH Will Change My Life

Let’s Get Personal (don't worry - no sad tales or post on why I'm quitting my blog)....in a little over a month, I’m headed to BASH! Not sure what BASH is? BASH is a conference created by Michelle Burt of Maddycakes Muse, designed to be the premiere networking conference for women entrepreneurs in the entertaining/lifestyle and party blogging industry. Today, I wanted to give you all a little insight as to why I choose this event over many of the others out there.

A few years back, I set up a group on Facebook of professional party bloggers and businesses connected to the party/entertaining/lifestyle world.  I've made some great friends through this group and it's afforded me opportunities to work with some of the most talented entertaining/lifestyle bloggers around, many of whom were bloggers I regularly followed.  So, it was a HUGE moment for me when asked to be on the team for BASH by Michelle, as she was one of those bloggers I followed. If you've been reading for a while, you might even remember I asked her to participate in my Favorite Things post some years back. 

I digress.....I just want to share with you why I want to attend this conference and how I believe it will change how I run my business and work with other professionals. For any of you who are event planners or party bloggers  looking to finally take that step to jump start your business, I really want you to read the following post that I shared with my professional party peer group on Facebook:   

Last year, I made up my mind that I was attending a blogging conference. I didn't know which one, I didn't know how it was going to happen, but I wrote it down on my “2014 Goals,” and put it in the hands of God and the Universe and I'll be damned – it’s happening!

I started my blog about five years ago. At that time, the blogs I followed were Polkadots & Pirates, The Tomkat Studio, Celebrations at Home, Stem Parties, Thoughtfully Simple, Paper & Cake, Maddycakes Muse, The Celebration Shoppe, Pizzazzerie, HWTM, Design Dazzle, Not Just a Mommy....to name a few (I know I am forgetting some…). These bloggers were only blogging for about a year or so, and in some cases just a few months before I started blogging.

After a few years of blogging myself and ESPECIALLY after moving the Party People group over to FB,  I started to notice something about my favorite bloggers. They were doing BIG THINGS - in my book! I was really impressed and admittedly envious at what they were achieving. How could all these people be so successful at blogging? What was I doing wrong? I blogged all the time and I shared my creative ideas too - shoot! I wanted to make money, too! Then, it hit me. All of them were connecting with each other at meet-ups and conferences. It hit me even more when I saw all the bonding that was happening through photos at these conferences (gotta love Instagram). I became very aware that they had a connection and bond with each other that was directly related to what I was seeing happening with their blogs. After getting to know a few of them through our FB group, I found out they just started to take their blogs and businesses very seriously and realized the importance of networking and getting out there personally. They just took the step.

When I look back at WHO I followed back then - and look at who is speaking at BASH - I realize that those are the same people I started out with when I started blogging. These are honestly people who I truly admire and have been inspired by. It is AMAZING the level and degree of talent that will be there in the lineup. I honestly look at the BASH site sometimes and shake my head and just think, WOW! All my favorite bloggers and party experts in one room, and I'm going to get to sit and talk with them and pick their brains (and trust me…I will be picking brains so you’d better get ready!). They have networked, built their brand, worked with HUGE brand name companies and products and are earning a living from it.

I am not sharing this just because I am on the BASH Team. I'm sharing this because I know that planning events and styling party spaces and being able to blog about it is what I love to do. It's my passion. It's ALSO what you all love to do, too. Looking back - I wouldn't think that in a million years ANYONE would be able to really share how to plan a party, how to create a dessert table, how to bake cupcakes and do all of these creative things where it becomes a career- but they have. They are living proof. They are going to be at BASH. So, my question is - WILL YOU?

I ask that question because I know there are so many of us reading this who want more for our businesses, for our families and for ourselves and we are always asking the question HOW? How did the other bloggers do it? I know for some, this is not an easy decision to make as it's an investment in time and money. But if you can do it, if you find a way to do so, I really want anyone who is undecided to just take that step. I know it will not only change the way you look at your own business, but for great relationship building, inspiration and sourcing.

If I sound very passionate about it, it's because I really am.  I believe in what Michelle is creating for BASH and what she wants for all of us.  She's put in a lot of work to put together a very stellar event that will help those who need and want to build their businesses to go to the next level.  Now go and register for BASH!
!!!

Read more about BASH and how to prepare for a conference here:


Tuesday, December 16, 2014

{Holiday Ideas} 3rd Annual Cookie Recipe Swap

Today, I'm sharing a yummy cookie recipe sent to me by Nikki Wills at Tikkido.  We exchanged cookie recipes as part of the 3rd Annual Holiday Cookie Recipe Swap hosted by  Julie from White Lights on Wednesday.

I must be honest, if you've been reading this blog for a while, you will know that I am not a cookie maker type of person.  I always say, it's not that I can't make them, I just don't....usually.  So, you might be wondering if I don't really bake cookies, why did I decide to participate in a cookie swap?  Well, simply because it sounded like fun and it would give me a chance to share a recipe with a different audience and maybe even make a new friend!  The irony in this is that the person I was selected to swap recipes with is someone who I'm already party friends with!  LOL  So, while I might not be making a new friend, at least if I botch the cookie recipe....I know that Nikki will go easy on me!

For the swap, Nikki shared a family cookie recipe with me for Big Soft Ginger Cookies that I must tell you, is so simple to make and sooo YUMMY. Nikki shared a funny with me that she actually has the word 'YUMMM!!!' written on her own recipe card -- and she wasn't lying!.


Christmas Cookies

Here's Nikki's recipe.

Big Soft Ginger Cookies

2 1/4 cups flour
2 t ground ginger
1 t baking soda
3/4 t cinnamon
1/2 t cloves
3/4 cups butter or shortening (you can also do 1/2 cup butter, 1/4 cup butter flavored Crisco)
1 cup sugar
1 egg
1/2 cup molasses (I added 3/4 cup of dark brown sugar)
sugar (for rolling balls of dough before baking)

1.In a medium mixing bowl, sift together flour, ginger, baking soda, cinnamon, and cloves.  set aside.


2. In an electric mixer, beat butter and Crisco on low speed for about 30 seconds.  Gradually add the 1 cup of sugar, and beat until fluffy.  Add egg and molasses, beat well.


3. Stir dry mixture into egg mixture, and mix until combined.


4. Shape dough into about 1 1/2 inch balls (a heaping tablespoon dough, or a small scoop.  Roll balls in the extra sugar and place on an un-greased cookie sheet about 2 1/2 inches apart.  This batch makes about 24 cookies.


5. Bake at 350 degrees for about 10 minutes, until light brown but still puffed.  Do not overbake!  Let stand on cookie sheets for 2 minutes, then transfer to a wire rack to cool.

Ginger Cookies, Christmas

 I did make some adjustments to the recipe Nikki sent.  I made these cookies late one evening and realized that I'd forgotten to pick up molasses from the store.  So,  I substituted it with a 3/4 cup of dark brown sugar.  Also, I ONLY used butter....not the shortening, simply because I didn't have shortening on hand.  I found that I had to bake my cookies a little longer than 10 minutes.  Since oven times vary, I would recommend making a small batch of cookies first and test the baking time out for your oven. 


Once your cookies have cooled, you can plate them (I made this dish using a glass plate from the dollar store and a Sharpie) on a dish or put into cellophane bags and pass out at hostess or teacher's gifts! Add a fancy tag and label and you're all set!

easy cookie recipe, recipe swap, ginger cookies


Thanks NIkki for your fabulous recipe and thanks to Julie for including me in the holiday cookie swap!  This was lots of fun.  To view other cookie recipes go to the links below.


HOST
CO-HOSTS
Aubrey from Real Housemoms
Laura from Pink Cake Plate
Abbey from The Cards We Drew
Kelley from Miss Information
Carli from Dimple Prints


cookie recipe swap, cookie exchange, Cristmas Coookies, Cookies for Santa


Thursday, December 4, 2014

{TUTORIAL} DIY Glass Footed Candy Dish


Remember back in the day, you'd go to your grandma's house or an older aunt or relative and there was ALWAYS a candy dish sitting out.  You know it had to have hard candy, peppermint, butterscotch....just a small sweet treat wrapped in cellophane!  Those are some of the memories I have as a child.  Well, I bringing those fond memories into my home now, since I now have my own grandchildren (ssshhhhhh.....). 

I came across a very pretty - almost Victorian style - glass bowl at the Dollar Tree (one of my fave places) and thought, boy this would make a cute candy dish....but, I wanted to put a spin on it.  I thought, why not make it a footed bowl!  So, I did.....and here's how I did it!!!!

To make this project you only need a few items......

Strong bonding glue - that will adhere glass to glass like E6000
Fancy glass bowl
Glass candlestick
CANDY!

Gather your supplies!


(I really wish I got a better picture of the bowl.....it's just pretty!)

Carefully place glue around the small end of your candle stick.  This will be the base (or foot) that your bowl will sit on.  Take care not to get the glue on your hands, in your eyes, on your clothes.....and for the love of God don't go sniffing it!  Open a window.  Seriously, you won't work with it that long, but just in case.


Turn your bowl over and adhere the candlestick to the center of the bowl.  Allow it to dry for at least an hour.


Once dried, you can add any old candy you want!  I added a festive bow to mine.  Cute right?


This project literally cost me $4 to make....I only paid for the glass pieces and candy.  I already owned the glue - which you can find at Home Depot or your craft store. You can make this item to keep for yourself and use year round.  It also makes a nice present.  Fill it with fudge or truffles and give to your host/hostess at your next holiday party!


If you like this project idea and want to save it for later, you can pin the image below to your Christmas Crafts Pinterest Board (and if you don't have one......create one.....cause I have more ideas to share over the next few days!!!!)


Related Posts

Related Posts with Thumbnails